Apple has announced ARKit in iOS 11 (beta).
Have a look, how we can measure using ARKit.
In this article, we will build a measuring app that would measure the length or width of objects.
Contents
We’ll see how ARKit will be useful to create an app that can be used in measurement. We’ll go through the demo project.
We’ll go through steps:
1. Identify prerequisites
2. Create project in XCode
3. Setup basic things
4. Setup focus object
5. Put object using hitTest
6. Measure
Let’s begin.
1. Identify Prerequisites
- Xcode 9 beta (download)
- An iOS device (iOS 11) of processors A9, A10. (i.e. iPhone-6S & above, iPad-2017 & above)
2. Create project in Xcode
- Open Xcode app and choose a template
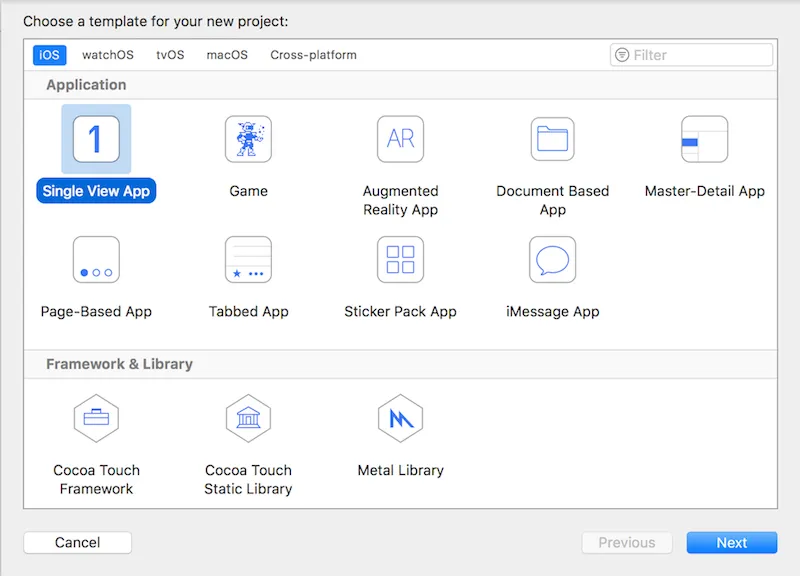
select “Single View App”
- Set project details
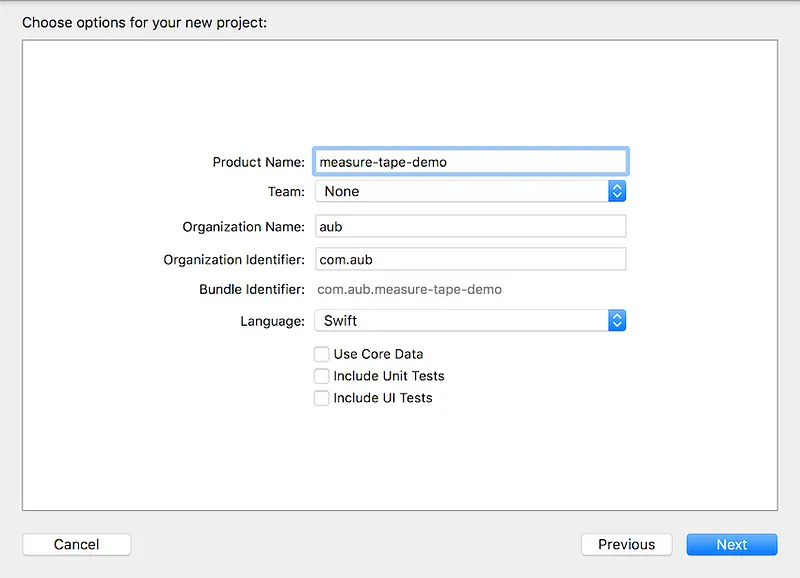
set “product-name”, “organization-name”, “Language”. (we’ll create demo in Swift)
3. Setup basic things
Before setting up, remember.
- ARKit is using ‘meter’ for length/width/height.
1. Add ‘ARSCNView’ to view and create IBOutlet.
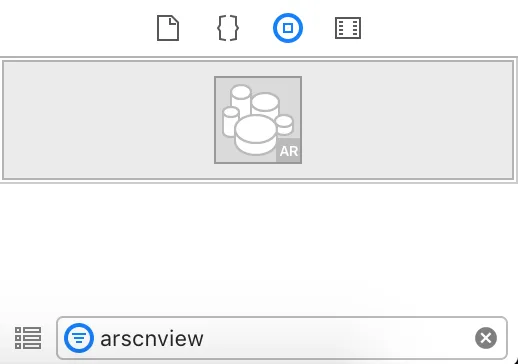
drag and drop the “ARSCNView” to “ViewController” and attach to the outlet
2. Resolve the error by importing ARKit

Error

import ARKit
3. Setup scene & ARSCNViewDelegate

confirm your ViewController class to protocol “ARSCNViewDelegate”
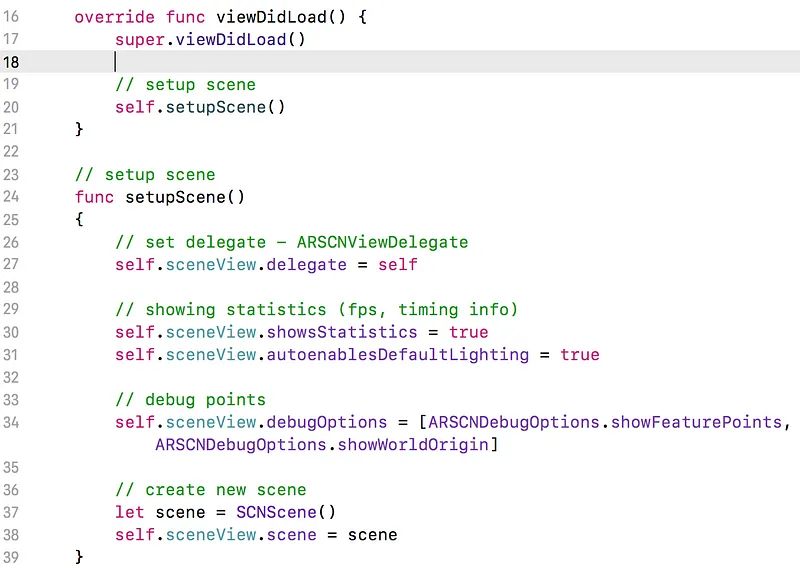
setup scene with options.
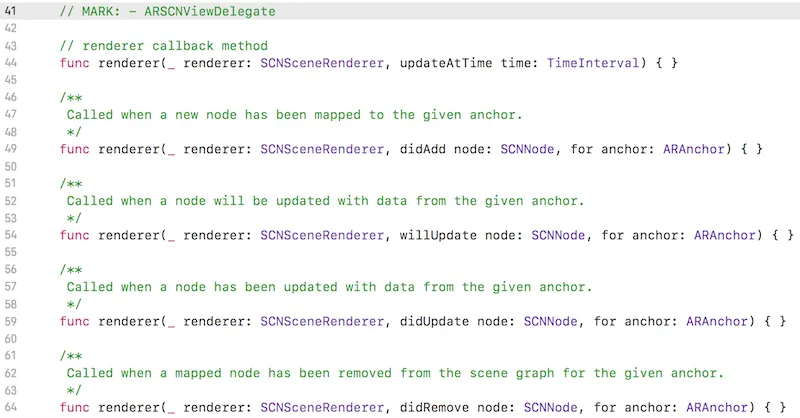
4. Implement methods
5. Camera usage description string

Add usage description string in “info.plist”
6. Setup ARSession
Create world-tracking session with horizontal plane detection and run on with sesssion of “sceneView”.

Setup ARSession with WorldTracking Configuration
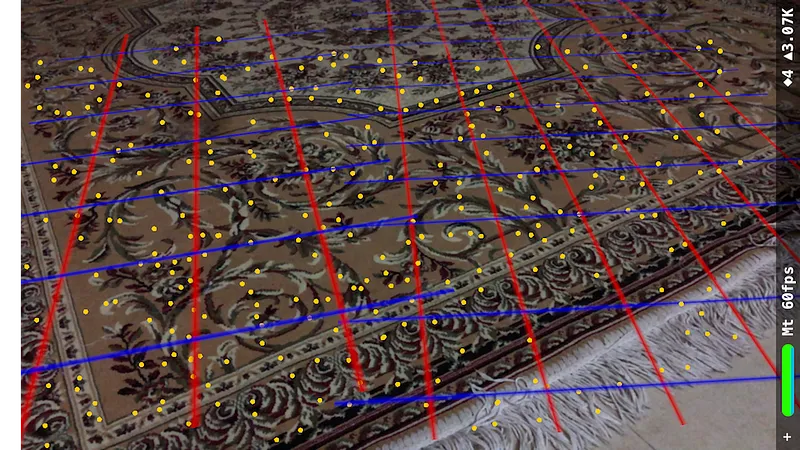
7. Run the project in your device.
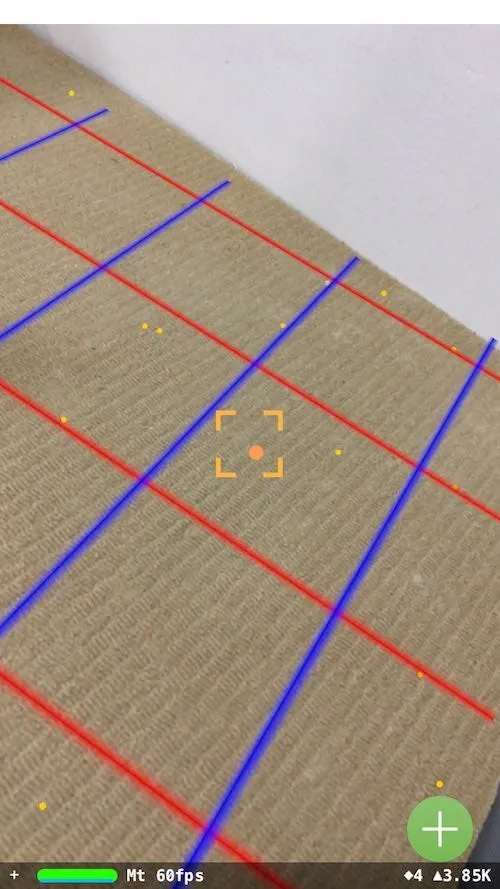
You should see feature points and the world-origin.
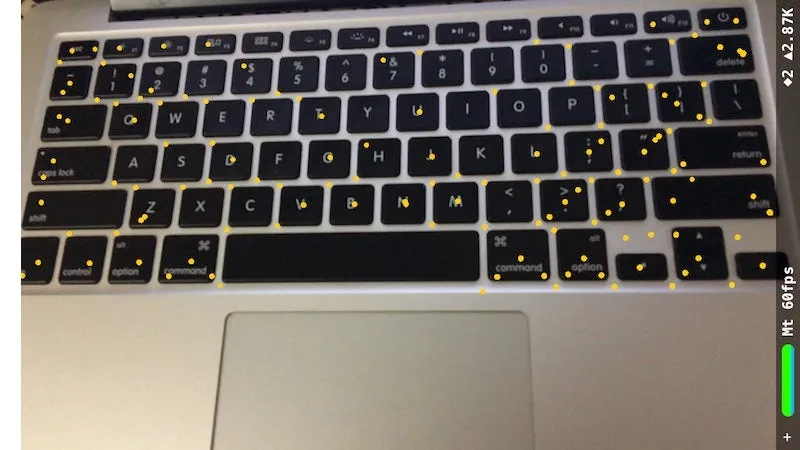
Feature points

World origin with axis (X,Y & Z)
8. Find ARPlaneAnchor.
ARKit will add new anchors when it has enough data points. We need some base planes to put our objects.
Add “grid” image, that will be placed on the plane. (download here)
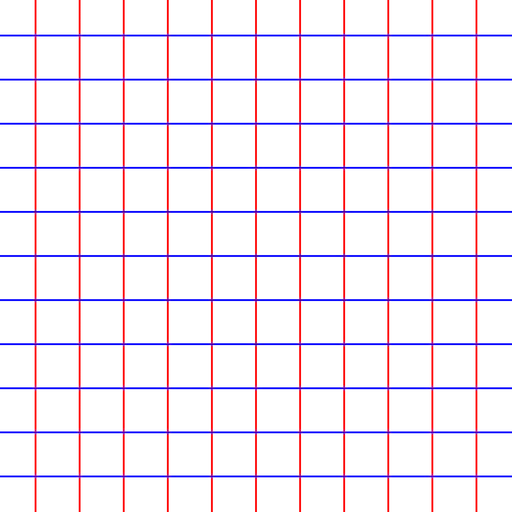
grid.png (you can use other grid image)
9. Create new class “Plane” extending “SCNNode”.
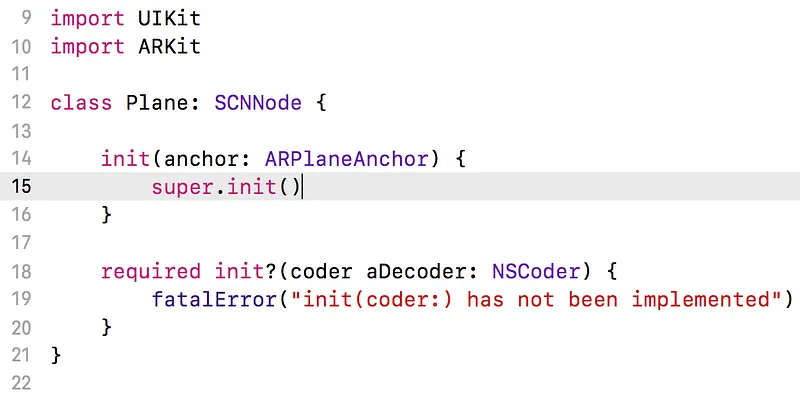
Let’s add initialization code in,
init(anchor: ARPlaneAnchor) {}
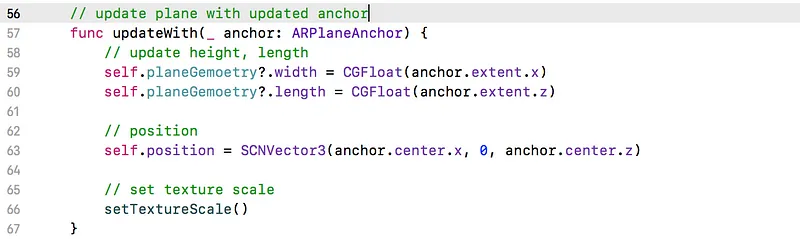
Determine width, length from anchor’s extent.
Here, plane-height is 0.01 meter that means 10 cm.

Remember, ARKit uses ‘meter’ for length/width/height.
Here, we will create a box (and will consider it as a geometry). set chamferRadius zero for now.

Among 6 sides of the box, we will put the grid image at the bottom side of the box. The index of bottom side is 4 in array of sides. So all sides have transparent materials except 4th index.

Create new plane-node with box-geometry and set the position.
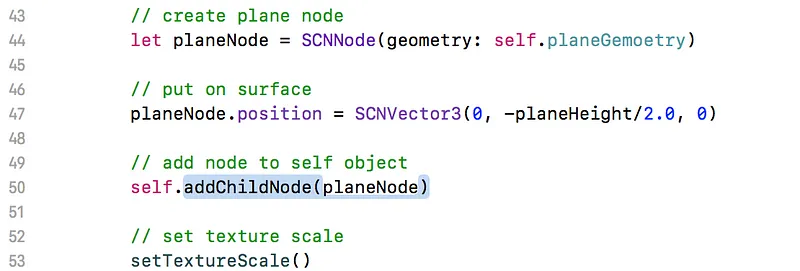
We are done with class initialization. Also you can see a function calling at bottom. We need to set texture accroding to the size of the plane.
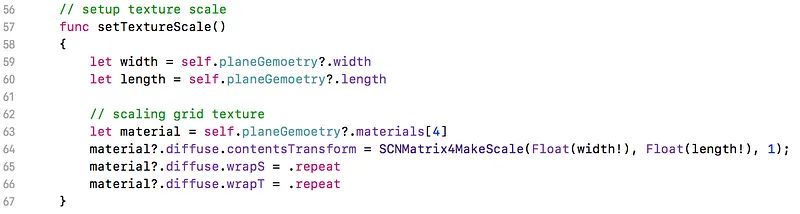
We are done with the initialization of the “Plane” class.
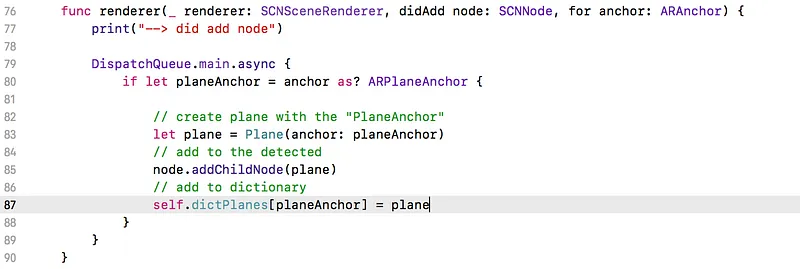
10. Let’s add plane object, when new ‘anchor’ is detected and anchor-node is added.
Go to ‘ViewController’.

We’re done with the plane detection and adding our plane on it.
- Now, run the project. You should see that grids are being added on detected planes.
Upto here, we’re able to catch feature points and anchors on those points. Also using those anchors we’re able to add our own plane-node. If you find anything not working, please feel free to drop message or comment in the box.
Also read: A Guide to HealthKit Data Reading/Writing in iOS
11. Let’s look how we can improve the plane detection.
Because when ARKit gives us a new anchor, we are creating a new plane object. But what if ARKit will detect the previously available plane but with more rich feature points. That means we should update the previous plane dimensions (width, length).
Where we will get callbacks of updation in anchor-node?
Here, in “ViewController”.

What should we do? How can we get previously added plane object?
Use dictionary,

Update code lines,
Add method in ‘Plane’ class to update plane,
Add code lines in ‘ViewController’, when anchor is updated.
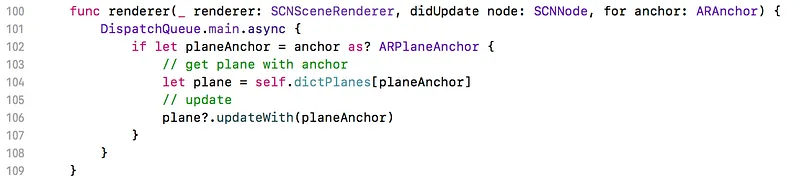
Also, remove the plane when the anchor is removed by ARKit.

So far, we have done basic setup. Let’s move on to the next step.
Also read: Learn How to Create Stunning Charts with Swift Charts
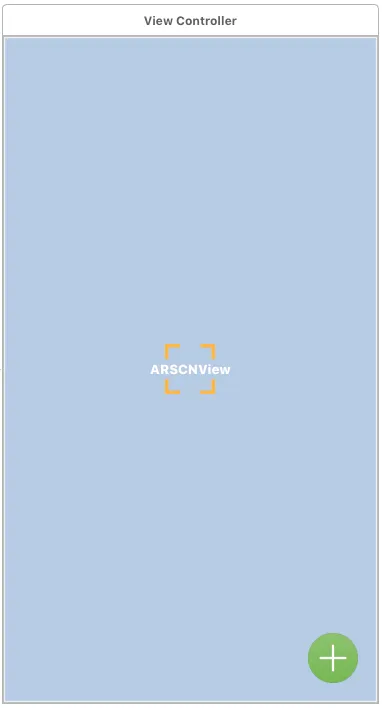
4. Setup focus view
Why we need this? It is for reference only. We’ll put a focus image at center of the view in storyboard. Set constraints for center.

Resource:

focus_square.png
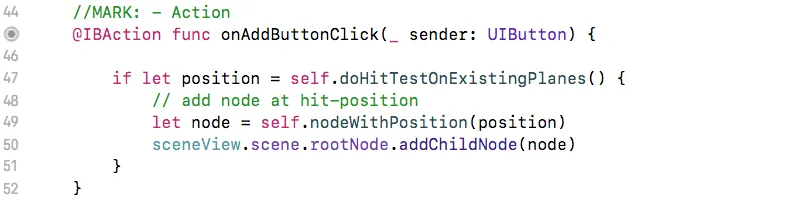
5. Put object using hitTest
We’re now ready to put object at focus-square’s position using hitTest.
Let’s add methods in ‘ViewController’.
- hitTest will give the position on the existing plane that intersects with center of the screen.
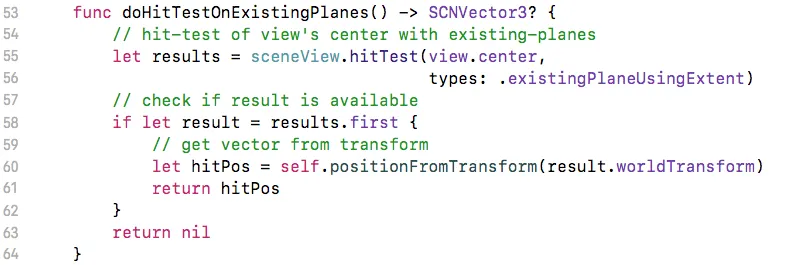
- Get ‘SCNVector3' from ‘transform’

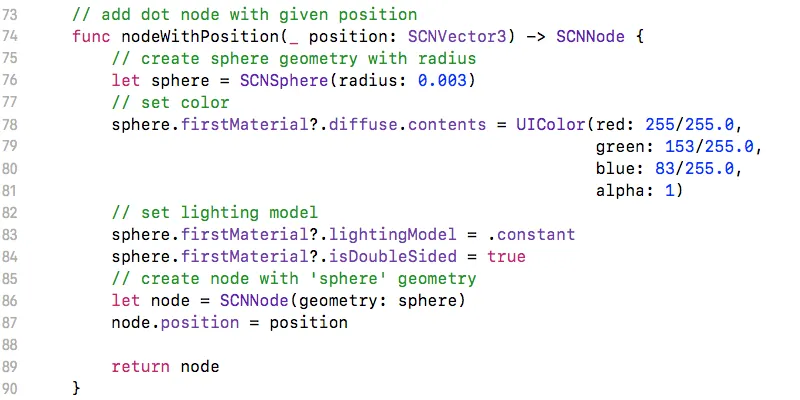
- create a node at position
How we use these functions?
Add button in storyboard and attach with action. [TouchUpInside]
- In button action,
Now run the project. On clicking the button, the dot should be added.
And the final step!!!
Also read: Exploring Common Code Smells: Types, Detection, and Solutions
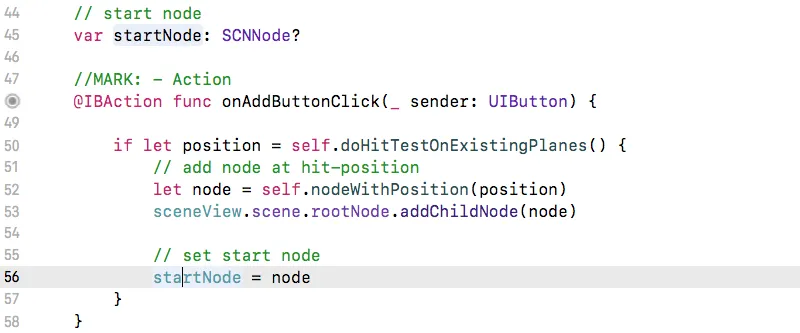
6. Measure
- Upto now we’re able to add dot-objects on the plane.
- Now we need to draw a line between 2 points. (start & end).
Set start-point node in button action,
Current-position on plane will be our end-point.
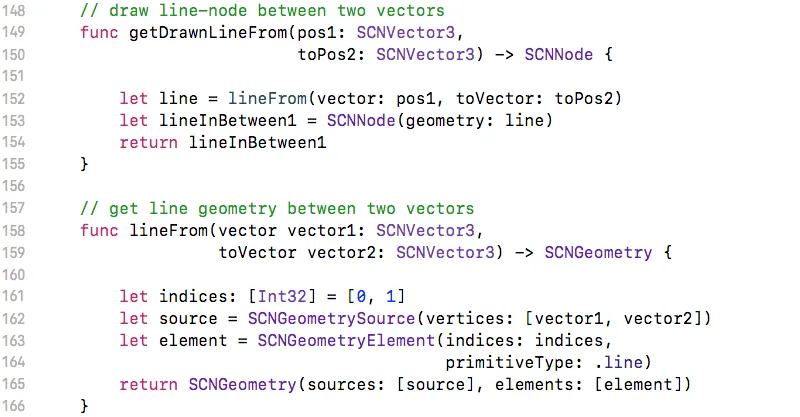
- Get current-position and draw line between two points.
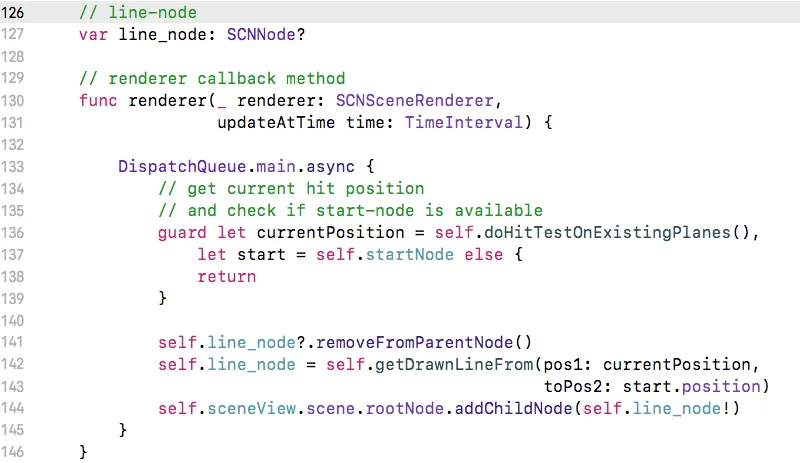
- Draw line between two vectors
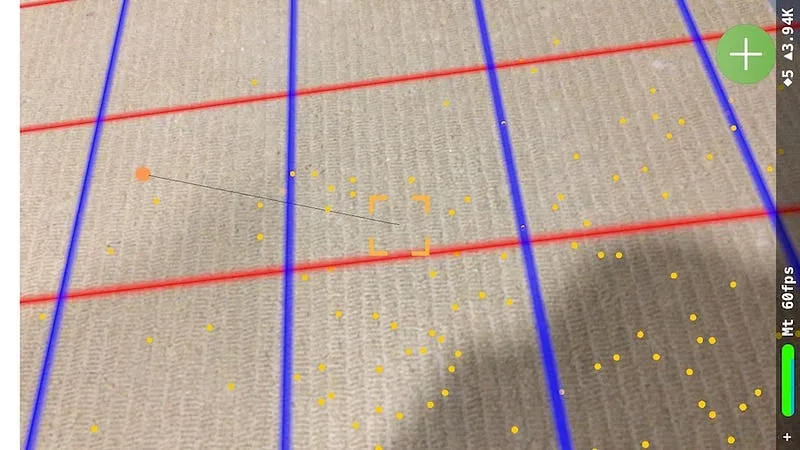
Now, when you press the button you’ll see line from drawn from start-node to your current-position (focus-square).
Let’s put label that will indicate distance between these two points.
- Create UILabel to show distance.

- Get distance string.
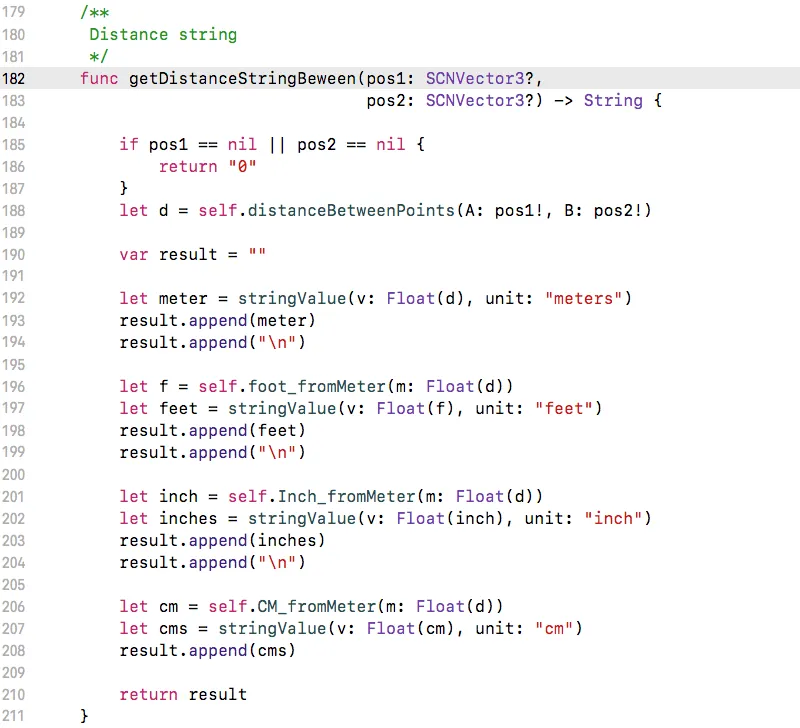
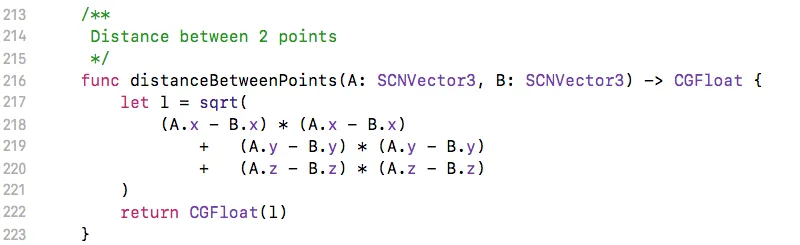
- Distance between 2 points.
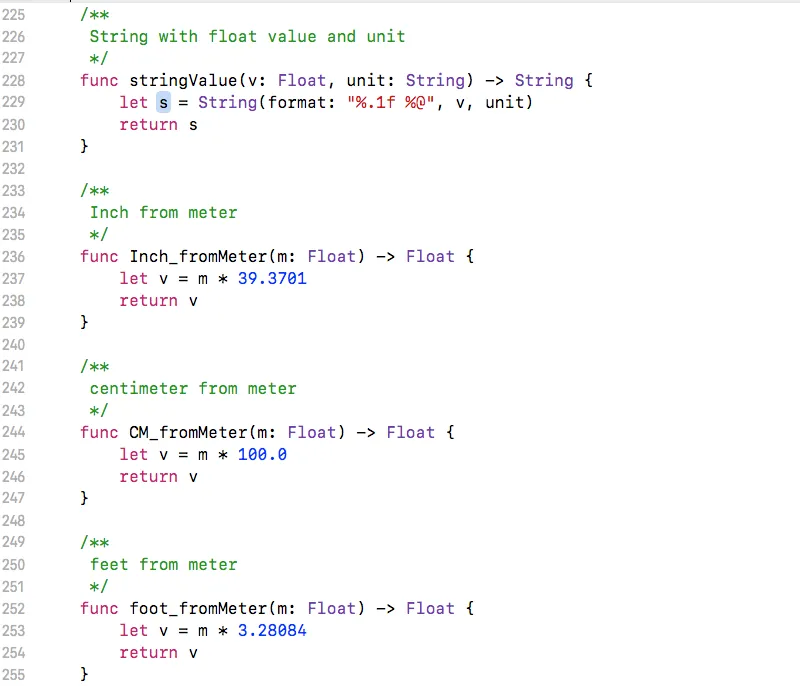
- Conversions.
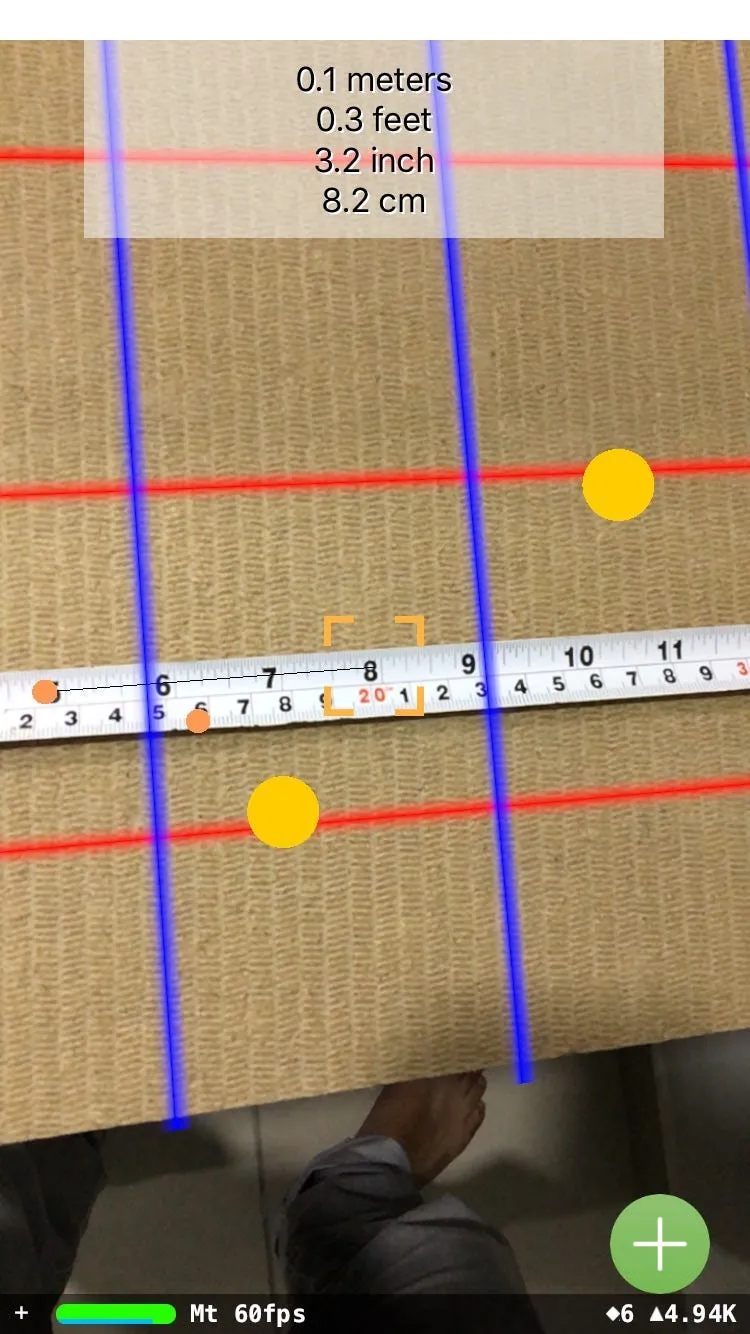
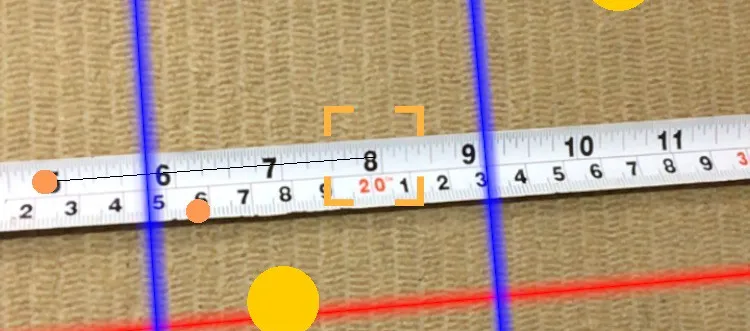
Measurements on screen,
Result video,
You can download the project from GitHub here. Please feel free to ask questions.
Also read: Learn How to Integrate Augmented Reality into Flutter